准备环境
服务器列表(虚拟机、Docker 均可,ip 以实际为准)
| 角色 | IP | 主机名 | server_id | 作用 |
|---|---|---|---|---|
| Master | 172.17.0.2 | mysql-master | 1 | 主库-写请求 |
| Slave1 | 172.17.0.3 | mysql-slave-1 | 2 | 从库 |
| Slave2 | 172.17.0.4 | mysql-slave-2 | 3 | 从库 |
给 Master、Slave1、Slave2 三台 DB 数据库服务器安装 MySQL,可以先将 MySQL 安装包上传至服务器(这里就不演示了)
[root@localhost ~]# ls
anaconda-ks.cfg  mysql-5.7.28-1.el7.x86_64.rpm-bundle.tar
[root@localhost ~]# tar -xvf mysql-5.7.28-1.el7.x86_64.rpm-bundle.tar
mysql-community-embedded-5.7.28-1.el7.x86_64.rpm
mysql-community-libs-compat-5.7.28-1.el7.x86_64.rpm
mysql-community-devel-5.7.28-1.el7.x86_64.rpm
mysql-community-embedded-compat-5.7.28-1.el7.x86_64.rpm
mysql-community-libs-5.7.28-1.el7.x86_64.rpm
mysql-community-test-5.7.28-1.el7.x86_64.rpm
mysql-community-common-5.7.28-1.el7.x86_64.rpm
mysql-community-embedded-devel-5.7.28-1.el7.x86_64.rpm
mysql-community-client-5.7.28-1.el7.x86_64.rpm
mysql-community-server-5.7.28-1.el7.x86_64.rpm
查看服务器中是否有自带的 mariadb,如果有,要移除,否则会冲突
[root@localhost ~]# rpm -qa|grep mariadb
mariadb-libs-5.5.41-2.el7_0.x86_64
[root@localhost ~]# rpm -e mariadb-libs-5.5.41-2.el7_0.x86_64 --nodeps
## 再次查看
[root@localhost ~]# rpm -qa|grep mariadb
正式安装 MySQL,注意安装顺序
- 先来 mysql-community-common
[root@localhost ~]# rpm -ivh mysql-community-common-5.7.28-1.el7.x86_64.rpm
warning: mysql-community-common-5.7.28-1.el7.x86_64.rpm: Header V3 DSA/SHA1 Signature, key ID 5072e1f5: NOKEY
Preparing...                          ################################# [100%]
Updating / installing...
   1:mysql-community-common-5.7.28-1.e################################# [100%]
- 再来 mysql-community-libs
[root@localhost ~]# rpm -ivh mysql-community-libs-5.7.28-1.el7.x86_64.rpm
warning: mysql-community-libs-5.7.28-1.el7.x86_64.rpm: Header V3 DSA/SHA1 Signature, key ID 5072e1f5: NOKEY
Preparing...                          ################################# [100%]
Updating / installing...
   1:mysql-community-libs-5.7.28-1.el7################################# [100%]
- 再是 mysql-community-libs-compat
[root@localhost ~]# rpm -ivh mysql-community-libs-compat-5.7.28-1.el7.x86_64.rpm
warning: mysql-community-libs-compat-5.7.28-1.el7.x86_64.rpm: Header V3 DSA/SHA1 Signature, key ID 5072e1f5: NOKEY
Preparing...                          ################################# [100%]
Updating / installing...
   1:mysql-community-libs-compat-5.7.2################################# [100%]
- 再接着 mysql-community-client
[root@localhost ~]# rpm -ivh mysql-community-client-5.7.28-1.el7.x86_64.rpm
warning: mysql-community-client-5.7.28-1.el7.x86_64.rpm: Header V3 DSA/SHA1 Signature, key ID 5072e1f5: NOKEY
Preparing...                          ################################# [100%]
Updating / installing...
   1:mysql-community-client-5.7.28-1.e################################# [100%]
- 再接着 mysql-community-server
[root@localhost ~]# rpm -ivh mysql-community-server-5.7.28-1.el7.x86_64.rpm
warning: mysql-community-server-5.7.28-1.el7.x86_64.rpm: Header V3 DSA/SHA1 Signature, key ID 5072e1f5: NOKEY
Preparing...                          ################################# [100%]
Updating / installing...
   1:mysql-community-server-5.7.28-1.e################################# [100%]
- 再接着 mysql-community-devel
[root@localhost ~]# rpm -ivh mysql-community-devel-5.7.28-1.el7.x86_64.rpm
warning: mysql-community-devel-5.7.28-1.el7.x86_64.rpm: Header V3 DSA/SHA1 Signature, key ID 5072e1f5: NOKEY
Preparing...                          ################################# [100%]
Updating / installing...
   1:mysql-community-devel-5.7.28-1.el################################# [100%]
初始化数据库
[root@localhost ~]# mysqld --initialize --user=mysql
查看初始化后 MySQL 的账户名和密码
[root@localhost ~]# cat /var/log/mysqld.log
2020-11-22T16:56:05.518869Z 0 [Warning] TIMESTAMP with implicit DEFAULT value is deprecated. Please use --explicit_defaults_for_timestamp server option (see documentation for more details).
2020-11-22T16:56:06.260995Z 0 [Warning] InnoDB: New log files created, LSN=45790
2020-11-22T16:56:06.368797Z 0 [Warning] InnoDB: Creating foreign key constraint system tables.
2020-11-22T16:56:06.431422Z 0 [Warning] No existing UUID has been found, so we assume that this is the first time that this server has been started. Generating a new UUID: 9cc56a78-2ce3-11eb-9cb5-000c29150471.
2020-11-22T16:56:06.496706Z 0 [Warning] Gtid table is not ready to be used. Table 'mysql.gtid_executed' cannot be opened.
2020-11-22T16:56:07.122745Z 0 [Warning] CA certificate ca.pem is self signed.
2020-11-22T16:56:07.302638Z 1 [Note] A temporary password is generated for root@localhost: ceZbIi5+OGbd
最后的 root@localhost: ceZbIi5+OGbd,eZbIi5+OGbd 这个就是用户名和密码
启动 MySQL
[root@localhost ~]# systemctl start mysqld.service
查看启动状态
[root@localhost ~]# systemctl status mysqld.service
mysqld.service - MySQL Server
   Loaded: loaded (/usr/lib/systemd/system/mysqld.service; enabled)
   Active: active (running) since Sun 2020-11-22 08:59:05 PST; 21s ago
     Docs: man:mysqld(8)
           http://dev.mysql.com/doc/refman/en/using-systemd.html
  Process: 12003 ExecStart=/usr/sbin/mysqld --daemonize --pid-file=/var/run/mysqld/mysqld.pid $MYSQLD_OPTS (code=exited, status=0/SUCCESS)
  Process: 11981 ExecStartPre=/usr/bin/mysqld_pre_systemd (code=exited, status=0/SUCCESS)
 Main PID: 12006 (mysqld)
   CGroup: /system.slice/mysqld.service
           └─12006 /usr/sbin/mysqld --daemonize --pid-file=/var/run/mysqld/mysqld.pid
登录 MySQL 命令行客户端,并修改密码
[root@localhost ~]# mysql -uroot -p
Enter password:
Welcome to the MySQL monitor.  Commands end with ; or \g.
Your MySQL connection id is 2
Server version: 5.7.28

Copyright (c) 2000, 2019, Oracle and/or its affiliates. All rights reserved.

Oracle is a registered trademark of Oracle Corporation and/or its
affiliates. Other names may be trademarks of their respective
owners.

Type 'help;' or '\h' for help. Type '\c' to clear the current input statement.

mysql> set password=password('root');
Query OK, 0 rows affected, 1 warning (0.00 sec)
exit 命令退出,重新登录
最好也关闭一下防火墙,免得有其他杂七杂八的问题
[root@localhost ~]# systemctl stop iptables
[root@localhost ~]# systemctl stop firewalld
[root@localhost ~]# systemctl disable firewalld.service
主从配置
主库的配置
编辑 my.cnf 文件
vi /etc/my.cnf
按字母 i 进入编辑模式,在文件中添加一下配置:
# 开启 binlog,后面配置从库的时候要保持一致
log_bin=mysql-bin
# 设置服务 id,每台服务器的 server 保持唯一,不可重复
server-id=1
# 每次 binlog 操作都进行磁盘同步
sync-binlog=1
# 忽略的库,后面配置从库的时候要保持一致
binlog-ignore-db=performance_schema
binlog-ignore-db=information_schema
binlog-ignore-db=sys
binlog-ignore-db=mysql
server-id这里主设置为 1,从依次往后排,2、3....
编辑完成后,按 Esc 退出编辑模式,再输入 :wq 进行保存退出
紧接着在终端中重启 mysql 服务
systemctl restart mysqld
连接主客户端,进行操作授权
mysql -uroot -p
Enter password: 这里输入密码,我的是:root
mysql> grant replication slave on *.* to 'root'@'%' identified by 'root';
mysql> grant all privileges on *.* to 'root'@'%' identified by 'root';
mysql> flush privileges;
查看主库状态:
mysql> show master status;
注意下图中标红的地方,配置从库会用到

从库 1 的配置
同理,编辑 my.cnf 文件,并重启
# 设置服务 id,每台服务器的 server 保持唯一,不可重复
server-id=2
relay_log=mysql-relay-bin
# 只读
read_only=1
# 忽略的库,后面配置从库的时候要保持一致
binlog-ignore-db=performance_schema
binlog-ignore-db=information_schema
binlog-ignore-db=sys
binlog-ignore-db=mysql
再登录查询从库状态
mysql> show slave status;
再配置从哪个主库同步
mysql> change master to master_host='172.17.0.2',master_port=3306,master_user='root',master_password='root',master_log_file='mysql-bin.000001',master_log_pos=869;
这里 master_log_file 和 master_log_pos 对应下面查询主库状态图中的红线
然后开启从库配置
mysql> start slave;
然后就可以查询从库的状态
mysql> show slave staus;
从库 2 的配置
同理从库 2 同从库 1 配置一样,注意 server-id 改成 3
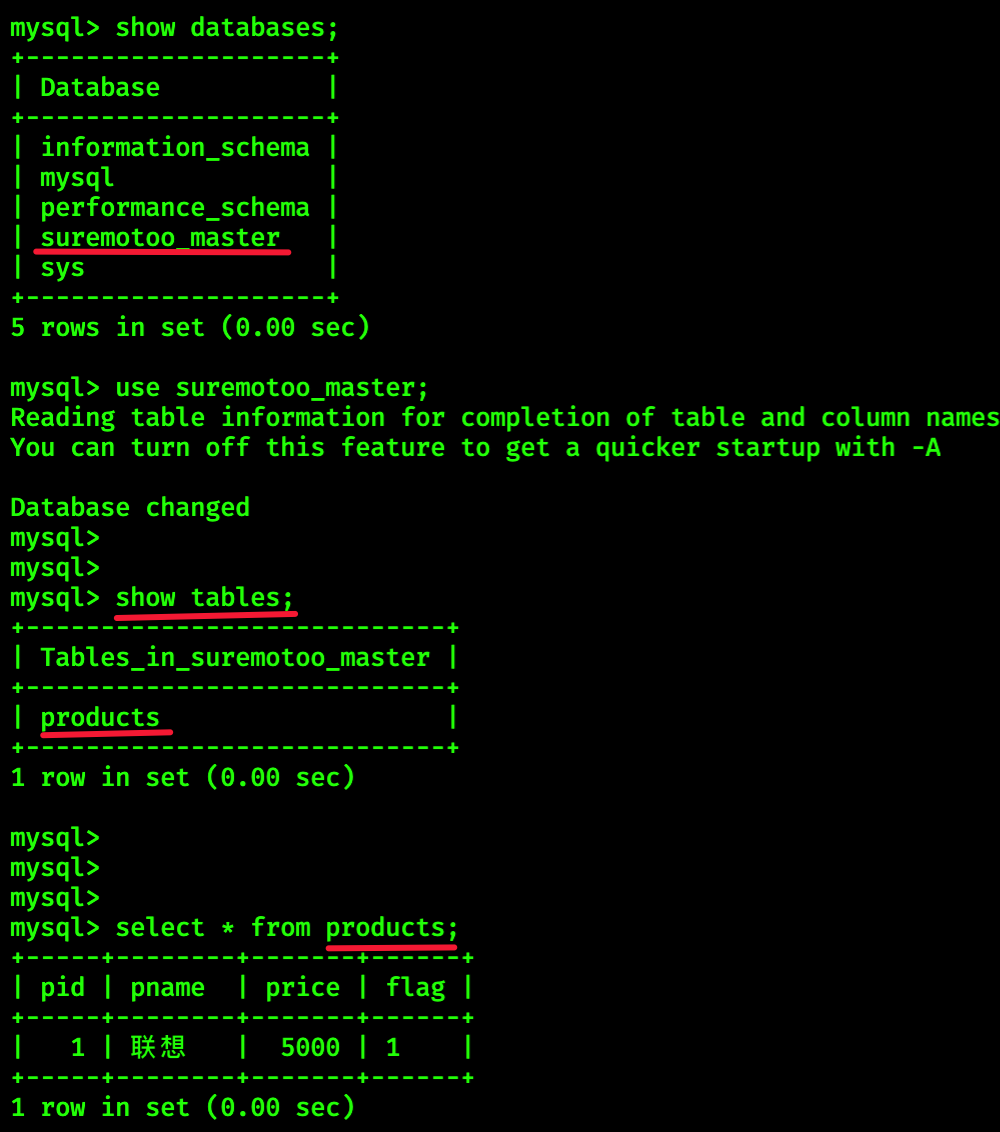
切回主库创建表语句
在主库每执行一条语句,就去两个从库查询一下,是否同步到从库
# 创建库
create database suremotoo_master;
# 创建完数据库,可以去从库查询一下,从库也会有该数据库

# 商品表
CREATE TABLE products(
    pid INT PRIMARY KEY,
    pname VARCHAR(50),
    price DOUBLE,
    flag VARCHAR(2)   #是否上架标记为:1表示上架、0表示下架
) engine=innodb charset=utf8;
# 创建完表,可以去从库查询一下,从库也会有该表

# 再尝试插入一条数据
INSERT INTO products(pid,pname,price,flag) VALUES('1','联想',5000.00,'1');
这里就不一一展示了,看个效果图
半同步复制
先登录主库的命令行客户端
mysql -uroot -p
Enter password: root

## 查看是否支持动态加载插件
mysql> select @@have_dynamic_loading;
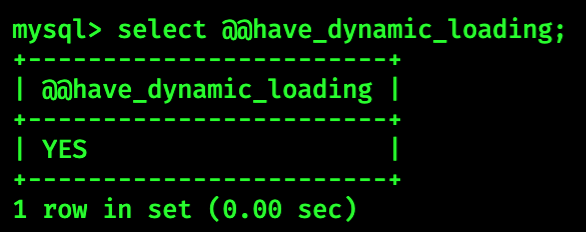
YES 说明支持
接下来安装半同步工具插件
mysql> install plugin rpl_semi_sync_master soname 'semisync_master.so';
安装完成后查看插件信息
mysql> show variables like '%semi%';
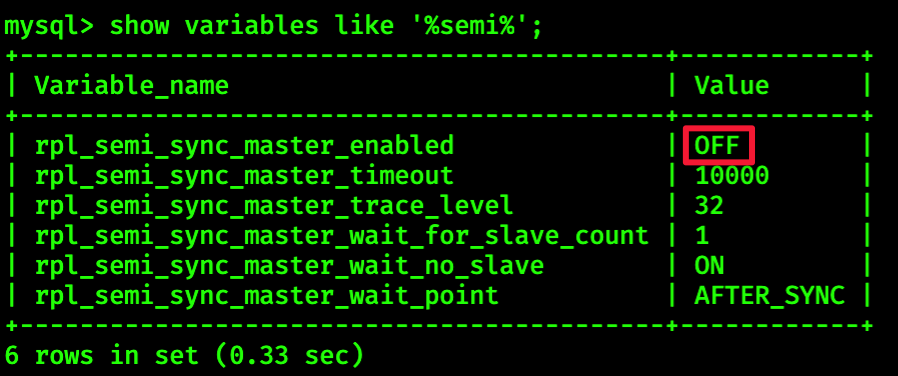
rpl_semi_sync_master_enabled 的值为 OFF, 说明现在处于关闭状态
rpl_semi_sync_master_timeout是延迟时间(单位毫秒),当前是 10 秒
我们调整一下这两个参数
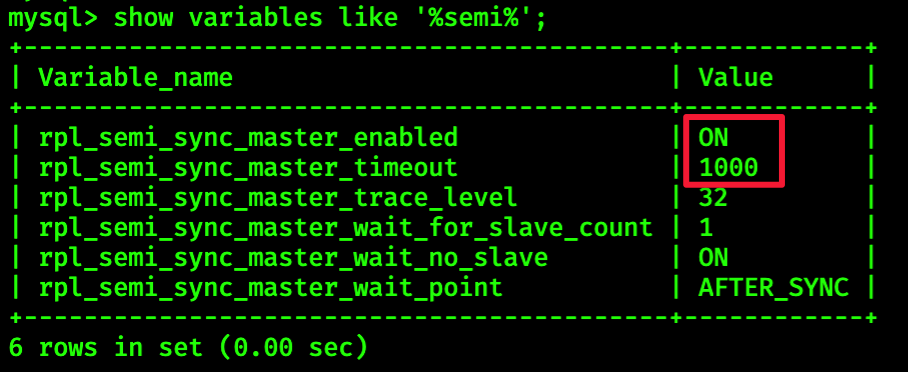
mysql> set global rpl_semi_sync_master_enabled=1;
mysql> set global rpl_semi_sync_master_timeout=1000;
最后还可以再进行查看:
mysql> show variables like '%semi%';
然后登陆从库,进行安装插件配置!
同样登陆命令行客户端(此处登陆就略过了...)
mysql> install plugin rpl_semi_sync_slave soname 'semisync_slave.so';
也可以查看下同步配置信息:
mysql> show variables like '%semi%';
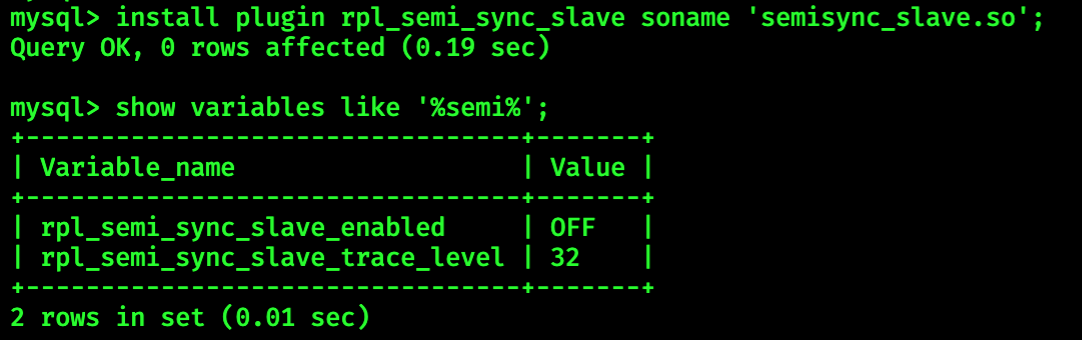
从库的配置信息比较少,我们就调整将其打开就行
mysql> set global rpl_semi_sync_slave_enabled=1;
# 打开后再查看
mysql> show variables like '%semi%';
最后,我们将从库重新进行加载
mysql> stop slave;
mysql> start slave;
回到主库,再进行插入数据测试,看看从库是否同步~ 😁😁,这里就不演示了
本文由 Suremotoo 创作,采用 知识共享署名4.0
国际许可协议进行许可
本站文章除注明转载/出处外,均为本站原创或翻译,转载前请务必署名
最后编辑时间为: Nov 26,2020